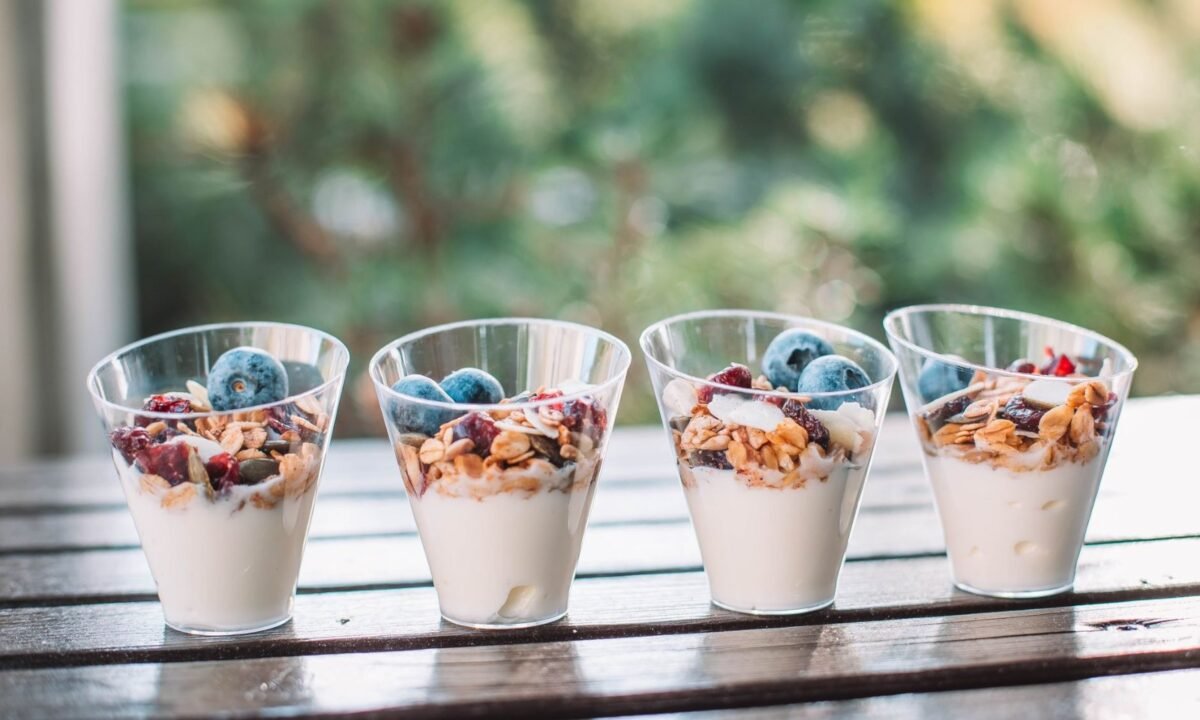
A yogurt cheesecake is one of the most practical desserts you can make at home: it needs no oven, only a bowl and a whisk, and it sets in the fridge while you do something else. These cheesecake cups use a blend of full-fat cream cheese and plain Greek yogurt for a filling that is thick, tangy and far lighter than a traditional baked version.
Each cup gets a crumbly graham cracker base, a smooth yogurt cheesecake filling and a spoonful of fruit or honey on top. Because they are portioned into glasses or jars, you can serve them without slicing, and they hold up well for guests or for a make-ahead dessert during the week.
The recipe below makes six cups. You can use any small glass, jar or ramekin, and the method stays the same.
Full recipe below
Greek Yogurt Cheesecake Cups
Why this yogurt cheesecake recipe works
The filling is built on two dairy ingredients that set well without baking. Cream cheese gives body and richness, while plain Greek yogurt adds tang and protein. Greek yogurt is strained, so it has less water than regular yogurt and produces a thick, spoonable texture rather than a runny one.
Using part yogurt and part cream cheese also cuts the calories compared with a classic cheesecake made only with cream cheese and heavy cream. A typical serving of this yogurt cheesecake carries roughly 12 to 15 grams of protein, which is a meaningful amount for a dessert. You can check the figures for your own brands with the USDA FoodData Central database.
Because nothing is baked, there is no risk of cracking, and the cups can be made in under 20 minutes of hands-on time. The chilling step does the setting. For a quick snack-style dessert that follows the same no-fuss logic, see our no-bake protein energy bites.
Ingredients you need for yogurt cheesecake cups, and how to choose them
- Graham crackers, 6 full sheets (about 3 oz): Choose plain honey or cinnamon graham crackers. Crush them finely in a zip-top bag with a rolling pin so the base packs tightly.
- Unsalted butter, 3 tbsp, melted: Unsalted lets you control the salt. It binds the crumbs into a firm base.
- Cream cheese, 8 oz, softened: Use full-fat block cream cheese, not the whipped tub style, which is too soft to set properly.
- Plain Greek yogurt, 1 cup (8 oz), full-fat or 2%: Strained, thick Greek yogurt gives the best texture. Avoid flavored yogurts, which add extra sugar and thin the filling.
- Powdered sugar, 1/2 cup (about 2 oz): It dissolves smoothly into cold dairy, unlike granulated sugar which can leave grit.
- Honey, 2 tbsp: Adds sweetness and a subtle floral note. Maple syrup works as a substitute.
- Vanilla extract, 1 tsp: Use pure vanilla for the most rounded flavor.
- Lemon zest, 1 tsp, and fresh lemon juice, 1 tbsp: A small amount of acid sharpens the tang and makes the dessert taste lighter.
- Fresh berries or fruit compote, 1 cup, for topping: Strawberries, blueberries or raspberries all pair well with tangy yogurt.
How to make the cheesecake cups step by step
- Place the graham crackers in a zip-top bag and crush them with a rolling pin until they form fine crumbs. You should have about 1 cup of crumbs.
- Stir the melted butter into the crumbs until evenly moistened. Divide the mixture among six 6 to 8 oz glasses or jars, about 2 tablespoons per cup, and press it firmly into the bottom with the back of a spoon.
- In a large bowl, beat the softened cream cheese with a hand mixer on medium speed for about 1 minute, until completely smooth with no lumps. Scrape down the bowl often.
- Add the powdered sugar, honey, vanilla, lemon zest and lemon juice. Beat for another 30 seconds until combined.
- Add the Greek yogurt and mix on low speed just until the filling is smooth and thick. Overmixing at this stage can thin the filling, so stop as soon as it is uniform.
- Spoon or pipe the filling over the crumb bases, dividing it evenly among the six cups. Smooth the tops with the back of a spoon.
- Cover the cups loosely and refrigerate for at least 2 hours, or up to overnight, so the filling firms up fully.
- Just before serving, spoon about 2 tablespoons of berries or compote over each cup. Serve chilled.

Storage and reheating for yogurt cheesecake
Keep covered yogurt cheesecake cups in the refrigerator at 40°F or below. Following the FoodSafety.gov cold food storage guidance, dairy-based desserts like these should not sit out for more than two hours at room temperature. The cups stay at their best for up to 4 days in the fridge.
Add fruit toppings just before serving rather than in advance. Fresh berries release juice that softens the graham base and can make the surface watery after a day.
Do not freeze the finished cups. Freezing breaks down the texture of the cream cheese and yogurt, leaving the filling grainy and weepy when thawed. These are a chilled dessert and do not need reheating.
Common mistakes to avoid with this yogurt cheesecake
- Using low-fat or regular yogurt: Thin yogurt leads to a loose filling that will not hold its shape. Stick with thick, plain Greek yogurt.
- Using cold cream cheese: Cold cream cheese forms lumps that are hard to remove. Let it soften on the counter for about 30 minutes before mixing.
- Overbeating after adding the yogurt: Beating too long at high speed whips air into the filling and can make it loose once chilled. Mix on low just until smooth.
- Skipping the chill time: Filling served after only 30 minutes will be soft and spoon out like pudding. Give it at least 2 hours.
- Packing the crust too loosely: A loose base crumbles when you dig in. Press the crumbs firmly with a spoon or flat-bottomed glass.
- Adding wet toppings too early: Fruit added in advance bleeds juice into the cheesecake layer. Top just before serving.
Swaps, variations and a lighter yogurt cheesecake option
- Lighter option: Replace the cream cheese with 1/2 cup part-skim ricotta blended until smooth, plus 1 cup Greek yogurt. Use non-fat Greek yogurt and reduce the powdered sugar to 1/4 cup. This version has fewer calories per cup and more protein, though the texture is softer.
- Lighter crust: Use crushed high-fiber oat cookies or a 2 tbsp mix of almond flour and oats instead of graham crackers, with 2 tbsp melted butter.
- Chocolate version: Stir 2 tbsp unsweetened cocoa powder into the filling and top with grated dark chocolate.
- Citrus version: Replace the lemon with the zest and juice of one orange and top with segments of orange.
- Dairy-free attempt: Plant-based cream cheese and thick plain coconut yogurt can work, but the set is less firm, so chill for at least 4 hours.
- Sweetener swap: Maple syrup or agave can replace honey in equal amounts, though the flavor will be slightly different.
What to serve with yogurt cheesecake cups
These cups are rich enough to serve alone, but a light accompaniment balances the tang. Fresh berries, sliced peaches or a spoonful of warm berry compote all pair well with the lemony filling.
For a fuller dessert plate, serve them after a simple salad or a bowl of grilled chicken and vegetables. Pairing a modest dessert with a protein-forward meal fits well with guidance from the Dietary Guidelines for Americans on balancing added sugars across the day.
For a snack, serve one cup with a few almonds or a piece of fruit. If you are building a higher-protein snack plan, our banana nice cream recipe offers another quick, cold dessert option.
Frequently asked questions
Can I make yogurt cheesecake cups without cream cheese?
Yes, but the texture will be lighter and softer. Blend part-skim ricotta until smooth and combine it with thick Greek yogurt in place of the cream cheese. The filling will set less firmly, so chill it for at least 3 hours.
How long does yogurt cheesecake need to chill?
Chill yogurt cheesecake cups for at least 2 hours so the filling sets fully. Overnight chilling gives the firmest, most sliceable texture.
Is yogurt cheesecake healthier than regular cheesecake?
It is generally lighter in calories and higher in protein than a classic baked cheesecake, because Greek yogurt replaces part of the cream cheese and no heavy cream is needed. Check the nutrition label on your specific brands to compare.
Can I use flavored Greek yogurt in this yogurt cheesecake?
You can, but flavored yogurts usually contain added sugar and fruit preparations that can thin the filling. Plain Greek yogurt with a little honey or vanilla gives the best texture and lets you control the sweetness.
Do yogurt cheesecake cups need to be refrigerated?
Yes. They contain dairy and should stay refrigerated at 40°F or below. They keep for up to 4 days when covered.
Can I make yogurt cheesecake cups ahead for a party?
Yes. Assemble the cups up to one day ahead, cover them and refrigerate. Add fresh fruit toppings just before serving so they stay fresh and the crust stays crisp.
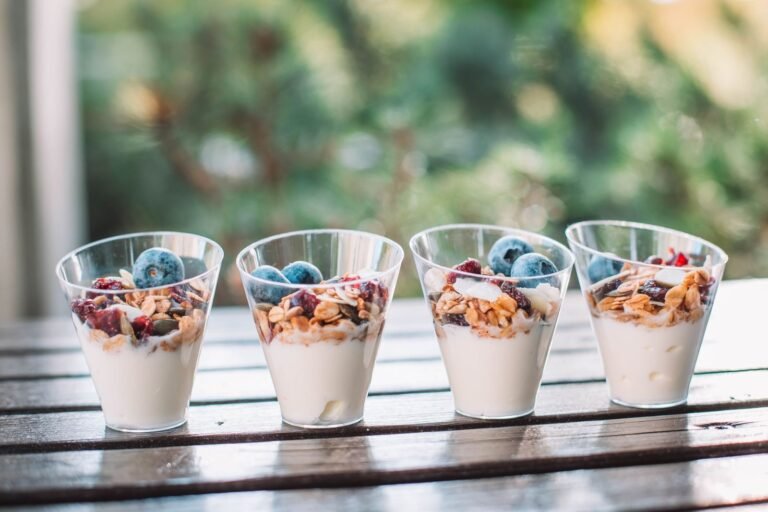
Greek Yogurt Cheesecake Cups
Creamy, no-bake yogurt cheesecake cups with a graham cracker base and fresh berry topping.
Ingredients
For the filling
Instructions
- Crush the graham crackers in a zip-top bag with a rolling pin until fine crumbs form.
- Stir the melted butter into the crumbs, then divide among six 6 to 8 oz glasses and press firmly into the bottoms.
- Beat the softened cream cheese on medium speed for about 1 minute until smooth.
- Add the powdered sugar, honey, vanilla, lemon zest and lemon juice and beat for 30 seconds.
- Mix in the Greek yogurt on low speed just until smooth and thick.
- Spoon the filling over the crusts, dividing evenly, and smooth the tops.
- Cover and refrigerate for at least 2 hours or up to overnight.
- Top with berries just before serving.
Notes
- Store covered in the refrigerator for up to 4 days. Do not freeze.
- For a lighter version, use non-fat Greek yogurt and part-skim ricotta in place of part of the cream cheese.
Nutrition per serving
- Calories
- 356
- Protein
- 7.2g
- Carbs
- 33.4g
- Fat
- 22.1g
- Saturated fat
- 12.5g
- Fiber
- 1.1g
- Sugar
- 23.1g
- Sodium
- 277mg
- Cholesterol
- 60mg